Getting Started
Generating a Basic TbSync Provider Add-on
Head over to
https://github.com/jobisoft/Provider-4-TbSync
and clone the provider add-on template repository. If you have a GitHub account yourself, you can simply add a copy of the provider add-on template to your own account.
After you have all the files on disc, run
./setup.py
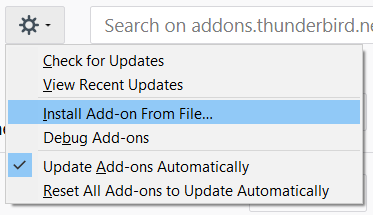
which will ask you a couple of questions to setup the provider add-on for you. After that is done, you can install your own provider add-on in Thunderbird 68. Just zip the project folder and install the file using the gear menu in the Thunderbird add-on manager:
To see your own provider add-on in action, you need to install the latest version of TbSync from the so called beta release channel for Thunderbird 68.
https://github.com/jobisoft/TbSync/wiki/Get-the-latest-TbSync-version#beta-release-channel
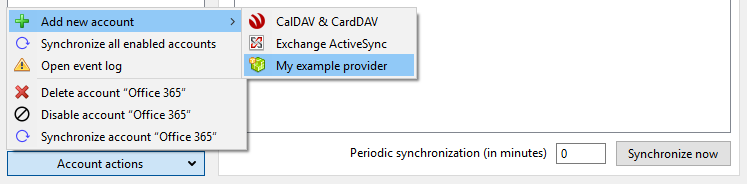
Please make sure, that you uninstall any other TbSync provider add-on or switch to their version from the beta release channel as well. Your own provider add-on should then show up in the “Add new account” menu of TbSync:
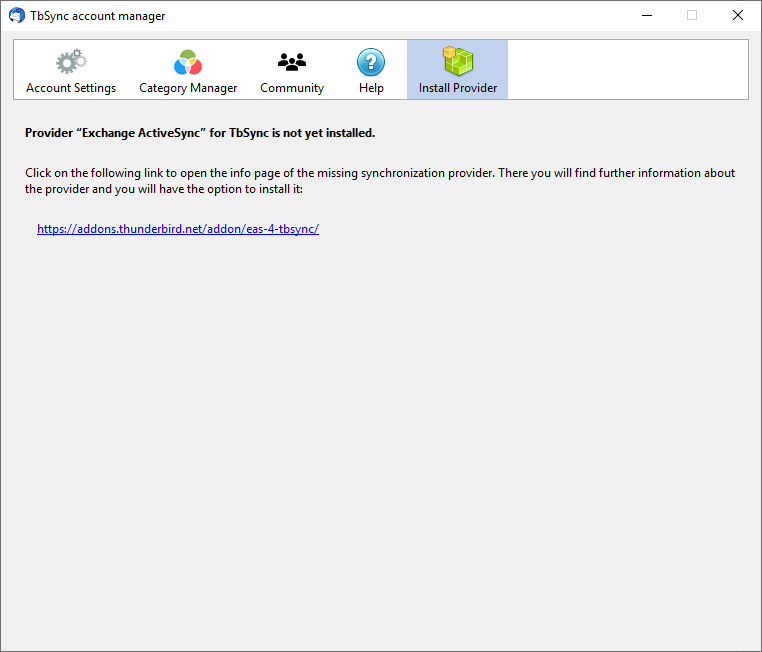
Once your TbSync provider add-on is stable and released to addons.thunderbird.net, it can be added as a standard entry to the “Add new account” menu of TbSync, so all TbSync users will learn about it and get directed to its add-on page. For example this is what users see, when they try to create an ActiveSync account, but the provider add-on for ActiveSync is not yet installed:
Directory Structure of the Generated Provider Add-on
These are the important files and folders of the generated provider add-on:
Project
├── bootstrap.js
├── chrome.manifest
├── manifest.json
├── _locales
│   └── en-US
│       ├── messages.json
│       ├── provider.dtd
│       └── provider.strings
├── skin
│   ├── logo16.png
│   └── logo32.png
│   └── logo48.png
└── content
    ├── provider.js
    └── manager
        ├── createAccount.js
        ├── createAccount.xul
        ├── editAccountOverlay.js
        └── editAccountOverlay.xul
The author suggests to not rename files or folders, to not break the add-on. The following list provides an overview:
- bootstrap.js
- This file is registering your provider add-on with TbSync. The generated file should work out of the box.
- manifest.json
- The main configuration file for your add-on. Further details about this file can be found in the MDN documentation. The generated file should work out of the box.
- chrome.manifest
- An additional configuration file for your add-on. You probably only have to change it, when adding further translations (locales).
- _locales
Folder containing files to translate your add-on into different languages. Add a subfolder for each language and register them in
chrome.manifest. The name of the folder must not be changed.- en-US/messages.json
- Localization for entries in
manifest.json. Check the MDN documentation for more details. The name of the file must not be changed. - en-US/provider.strings
- Localization for your add-on, which can be accessed from JavaScript. The name of the file may be anything you like, but it must be announced via
Base.getStringBundleUrl()as TbSync needs to access some of your localized strings. In paticular error messages and synchronization states your add-on is using. - en-US/provider.dtd
- Deprecated localization for XUL files of your add-on. Try to avoid its usage and instead set the localized labels of XUL/HTML elements via JavaScript. The generated provider add-on is using this in
createAccount.xulandeditAccountOverlay.xul.
- skin
- Folder containing all your additional resources like images and CSS files. It exists for historical reasons and the author is used to that approach. The generated provider add-on also stores its logo files there. If you change their names, please also update your manifest.json and your implementation of
Base.getProviderIcon(). - content
Folder containing your add-ons source files.
- provider.js
- File containing your implementation of the
Base()class and a few other classes, depending on what your add-on is supposed to do. See Implementing the Provider Classes for more details. - manager
- Folder containing resources used be the manager UI. In paticular the XUL file for the Create new account dialog of your provider add-on (see
Base.getCreateAccountWindowUrl()) and the XUL file containing your tabs for the Edit account dialog (seeBase.getEditAccountOverlayUrl()).